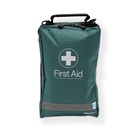
Marine First Aid Level 4 (VTQ)
Course Content
- Course Introduction
- Human anatomy and physiology for immediate emergency care
- Safety and Calling for Help
- What3Words - location app
- Marine band radios
- Marine VHF Radios
- Common Coastal Water Dangers
- Common Fresh Water Marine Dangers
- Emergency Flares
- LED Flares
- The Coastguard
- The Air Ambulance
- Personal Location Beacons
- Accident Prevention
- Boat Safety
- Calling for help
- Water safety tubes
- Types of Blankets
- Emergency response for hybrid and electric boats
- First Aid and Safety Equipment\
- Initial Assessment and Care
- Basic airway management in emergency care
- CPR
- AED
- Administration of oxygen therapy
- Drowning
- Choking
- Shock
- Bleeding
- Catastrophic Injury
- Injuries
- Hypothermia
- Illness
- FIrst Responder - Management of injuries
- Prioritising first aid
- Pelvic Injuries
- Spinal Injuries
- Rapid Extrication
- SAM Pelvic Sling
- Box Splints
- Spinal Injury
- Stabilising the spine
- Spinal Recovery Position
- Introduction to Spinal Boards
- The spinal board
- Using the Spinal Board
- The Scoop Stretcher
- Using the scoop stretcher
- Cervical collars
- Vertical C-Spine Immobilisation
- Joint examination
- Adult fractures
- Types of fracture
- First Responder - Management of trauma
- Elevated Slings
- Lower limb immobilisation
- Elevation Techniques
- Helmet Removal
- Different Types of Helmets
- The Carry Chair
- Applying Plasters
- Strains and Sprains and the RICE procedure
- Eye Injuries
- Electrical Injuries
- Foreign objects in the eye, ears or nose
- Nose bleeds
- Bites and stings
- Chest Injuries
- Foxseal chest seals
- Abdominal Injuries
- Treating Snake Bites
- Types of head injury and consciousness
- Dislocated Shoulders and Joints
- Other Types of Injury
- Dental Injuries
- First Responder - Management of medical conditions
- Asthma
- Asthma Spacers
- When an Asthma inhaler is not available
- Accuhaler®
- Heart Attack
- Warning signs of cardiac arrest and heart attack
- Heart Attack Position
- Aspirin and the Aspod
- Stable angina
- Hypertension
- Pulse Oximetry
- Epilepsy
- Epilepsy treatment
- Meningitis
- Diabetes
- Blood Sugar Testing
- Poisons and Food Poisoning
- Shock
- Near and secondary drowning
- Cold water shock
- Allergic Reactions and Anaphylaxis
- Course Summary
Need a certification?
Get certified in Marine First Aid Level 4 (VTQ) for just £49.95 + VAT.
Get StartedNon Rebreather Mask
Unlock This Video Now for FREE
This video is normally available to paying customers.
You may unlock this video for FREE. Enter your email address for instant access AND to receive ongoing updates and special discounts related to this topic.
What we are going to do now is the non-rebreather mask and the non-rebreather mask comes in plastic bags. It is not normally sterile. They come in with the tubing and the mask. Sometimes they are connected, this particular brand is not. The tubing itself is just what connects the mask to the cylinder. We will connect that up shortly. The mask itself is flat. You just need to open it up and this little piece of metal at the top, you just open that out because that is what will grip over the nose. You have got the elastic, which goes around the back of the head and you can actually literally just pull here to tighten it around their face, just so it holds in place. You have the parts on the end here, which is the feed where the oxygen goes in.And this is the reservoir bag. So basically, the oxygen goes in through here, into the bag and then the patient breathes the oxygen from the bag. There are also little valves on the side. These are one-way valves. So that when they breathe in, they are closed and when you breathe out, it will allow the air to pass out. So it is not trying to force the air back here around the edge. It is easily going out through these valves on the side. So that is basically the valve. So all you do is take the tubing here, push it on the end. All these oxygen fittings are just push-fit. So that is now set up. Take your cylinder. So we will do just take the cylinder out to make it easier. And then the tubing on this end, push it onto the valve on the end. And the gauge there is showing we have got loads of oxygen.But just to demonstrate how this works, when you first turn it on, it is a good idea to pop your finger on the end just to prime the bag. So, turn the oxygen on and you turn it on to 15 litres a minute. And then that will fill the bag up. Once the bag is full, that is then ready to put on to the patient. As they breathe in, the oxygen will be sucked out and as they breathe out, it has got time for it to fill back up again. If they are breathing very, very fast, you might find that they do empty the bag, or in some cases, because of the way it seals around the face, you might find that the bag does not appear to be sucked out, but they are getting that oxygen because you can hear and feel it through there and it is definitely coming out. If you need to, you can just turn the flow rate down, if you want to give a lower flow rate to the patient.The non-rebreather mask is probably one of the main masks that you are using within the responder side. It is used for a breathing patient and the patient could be conscious or they could be unconscious. But it is definitely not used for the non-breathing patient because it will not have any effect on them. So if you had a breathing patient, you can use this. This could be someone suffering from an injury, or it could be someone in the recovery position. If you have got someone who is unconscious, you need to keep an eye and make sure they are still breathing. So monitor their breathing at all times. And also make sure the oxygen cylinder is close to them. You are not going to need kinks the pipes, and it is not going to be damaged there at all.So we are now going to just demonstrate putting this onto a conscious breathing patient. So the mask itself, to start with, we are just going to turn it on. We are going to check that the bag is fully inflated. And it is a good idea always, when you put it on to somebody, just to explain to them that, "This is oxygen, it might help you, you will not... You can not taste it, it will not affect you, but it will help your conditions. Okay?" So you are gaining some consent. You then do, "I am just going to pop put this over your mouth and put that around your head. There you go. I am just going to pull this a little bit tighter here just to put it on your face. Okay, just breathe normally. That is it. Just squeeze that over your nose. Is that comfortable?" All right.So when they have got it on their face, you might find that people are trying to take it off when they are talking. Now you can talk through it, it is not easy, but you need to be very careful in how you are hearing and do not stress them if you can not understand them properly. If you do need to take it off slightly, you can just peel it away slightly to allow them to talk and then you can pop it back on to get the maximum chance of them getting as much oxygen as possible. Any time this is on on the patient, do make sure that they are conscious.In this instance, we do not want him to... If he does pass out, we want to make sure there is a clear route for them to fall and we can gently lower him down to the ground and check for his responses. Once you put the mask on, if you need to take it off, what we can then do is just take this off. Here you go. Just be careful when you are taking it off, not to ping this on him. Then just turn the oxygen off on the cylinder. Make sure it is fully off. And then this is a single-use mask, so this mask would then be thrown away.One variation with the oxygen mask, the non-rebreather mask. If you had a patient with a neck collar on... Now for this example, what we have done is just put the collar on. I know, in the real world, there would be lots of other people around the neck with the collars, but we are just looking at how the mask could be put on. So with this, you can turn the oxygen on. Once the oxygen is on, check if the bag is full. And if you are putting the mask on, again, if they are conscious, you are talking to them and even if they are not, you carry on talking to them. And rather than put the elastic around the back of the head, what we are going to do this time is apply the mask over the mouth and nose and then we are going to take the elastic and hook it on these little pegs here. These are designed to hook the mask on. What you can then do also is just pull this tight, the elastic here. So it is tight.Just check, like here, we just got it into his eyes, so we just lift that away a little bit. Or you can just pop it up to here. Now you can still see, if we need to, we can always adjust it on his face. You have got 100% oxygen going in and there is no string elastic going around the back of the head. Because if we start putting stuff around the back of the head with a spinal injury, we could then run the risk of doing more damage. So this can stay in place. The main thing is if you then put him on to scoop stretchers in transporting him, you have now got oxygen connected. So make sure someone is there just to manage where the oxygen is going so that you are not getting the mask pulled off or the tubing getting pulled too tight or the cylinder being knocked over. So the cylinder itself can transport with the patient.If it is a proper stretcher, there might be a place to put it on. If not, you may find this... You can lay between his legs or literally have someone else carry the oxygen in the... Right next to the head end of the patient. So in summary, this is a very easy way... A lot of people forget about these little hooks here or they do not know what they are. So it is a very easy way to put the mask on and it is... In putting that on, I have not had to touch his head at all. I have not had to lift it, I have not had to move it, I have not had to twist it. So if you are putting these on to a patient with a collar on, always use these hooks.
Using a Non-Rebreather Mask for Oxygen Administration
1. Introduction to the Non-Rebreather Mask
Overview:
- The non-rebreather mask is a common device for oxygen administration.
- It is typically supplied in plastic bags and consists of a mask and tubing.
2. Non-Rebreather Mask Components
Key Components:
- The mask is usually flat and can be opened for use.
- A metal piece at the top of the mask helps secure it over the nose.
- Elastic straps ensure a snug fit around the patient's head.
- The mask has inlet ports for oxygen flow and a reservoir bag.
- One-way valves on the mask allow exhalation without rebreathing exhaled air.
3. Setting Up the Non-Rebreather Mask
Assembly and Connection:
- Connect the tubing to the mask; these fittings are typically push-fit.
- Attach the other end of the tubing to the oxygen cylinder valve.
- Ensure that the oxygen flow rate is set to 15 litres per minute.
4. Using the Non-Rebreather Mask
Proper Application:
- If the bag is not fully inflated, prime it by briefly covering the mask's inlet.
- Fit the mask over the patient's mouth and nose.
- Adjust the elastic straps for a secure and comfortable fit.
- Explain the use of oxygen to the patient and gain their consent.
5. Monitoring and Caution
Monitoring Breathing:
- Continuous monitoring of the patient's breathing is essential.
- Ensure the oxygen cylinder is positioned to prevent kinks or damage to the tubing.
6. Special Considerations with Neck Collars
Using the Mask with Neck Collars:
- For patients with neck collars, fit the mask as usual.
- Instead of securing the elastic behind the head, hook it onto designated pegs on the mask.
- Adjust the elastic for a snug fit without compromising neck stability.
- Ensure oxygen management during patient transport to prevent mask dislodgment.
7. Conclusion
Effective Oxygen Administration:
- The non-rebreather mask is a valuable tool for oxygen administration in various scenarios.
- Proper usage and careful monitoring are crucial to ensure patient safety and oxygen effectiveness.